Connect to Azure Key Vault using managed identities
October 17, 2020
Hello!
How many times have you tried to write a script that needs to open a connection to a remote machine such as a SFTP server? Most probably this machine will ask you to authenticate before uploading any files. In order to perform authentication, you would need to provide the username and password for the connection to be established. Normally, you would have to store these credentials somewhere on the disk. If you were smart enough to avoid storing such sensitive information in plain text, you would use the "ConvertTo-SecureString" cmdlet in order to encrypt the password. In most cases, only the user who encrypted the password could decrypt it.
If you are looking for a way to avoid storing these credentials on your machine, let me introduce you to Azure Key Vault. It's a service that can help you store your keys, secrets and certificates in a secure manner, either using Microsoft-managed keys or customer-managed keys backed by a Hardware Security Module (HSM). That said, you could safely store your script passwords into Azure and retrieve them temporarily during runtime, as long as the script execution lasts.
As you may expect, Azure Key Vault implements Role Based Access Control policies in order to granularly define who can access it and which secrets they can retrieve. You might wonder, why should I use a Key Vault if I need to authenticate against it, using stored credentials? Well, the solution to that is provided by his majesty, Azure Active Directory and its System Assigned Managed Identity feature. This way, your Azure VM can connect to Azure Key Vault without having to store any credentials on the disk or the script code. Let me show you how that works.
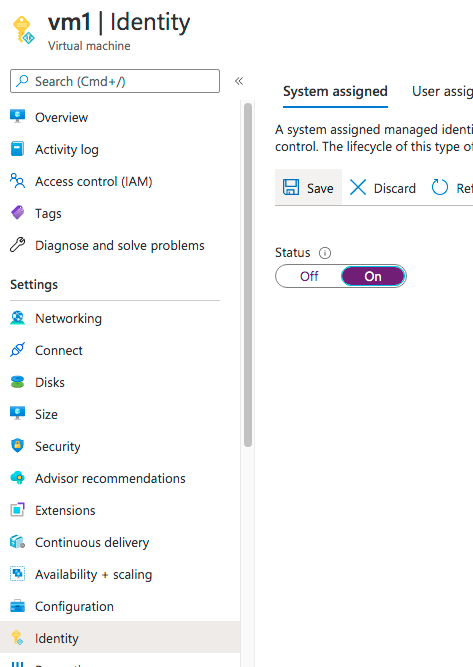
First, go to the Azure portal, look for your Virtual Machine where your script runs and go the "Identity blade". In the "System Assigned" tab set "Status" to "On" and click "Save". What happens in the background is that your Azure VM receives a service principal in Azure Active Directory and you can use it in order to allow your VM to access any Azure resource that supports Azure AD authentication.
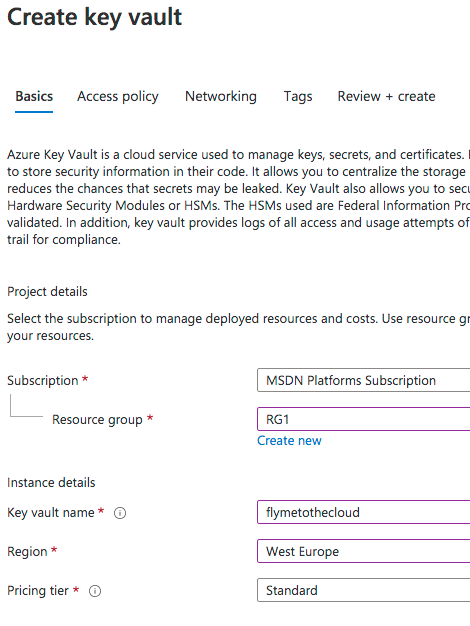
Next, let's create our Azure Key vault. In Azure Portal search for "Key Vault" and then choose "Create Key Vault". In the "Create Key Vault" page we just need a few basics such as Resource Group name, Key Vault name, Region and Pricing Tier. Here we choose "Standard". We can opt-for "Premium" in case we prefer to use a Hardware Security Module (HSM) to protect our keys. Not our case, so we go with "Standard". We will not examine the rest of the tabs in this article, let's go straight away to "Review + create" and then "Create".
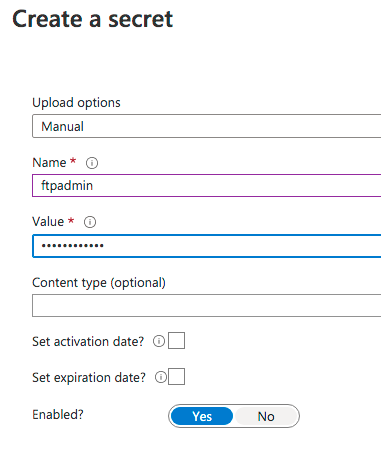
Now we need to perform some configuration on our newly created Key Vault. First, we need to add the password that we are going to retrieve later. In the Azure Portal, look for your Key Vault, move to the "Secrets" blade, and choose "Generate\Import". Give a name to your secret such as "ftpadmin" (this could be your username) and type the actual password in the "Value" field. Make sure "Enabled" is set to "Yes" and click "Create".
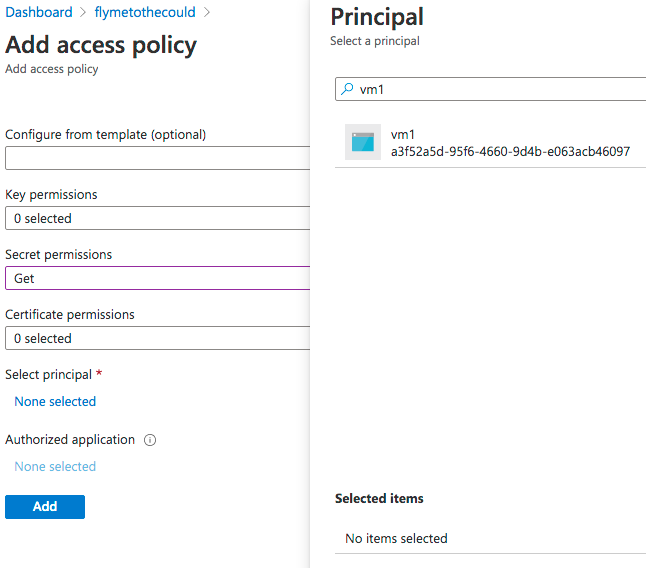
Back to our Key Vault page, go to the "Access policies" blade and choose "Add access policy". Since we are going to retrieve a secret, we need to authorize our Azure VM for this action. In the "Secret permissions" menu choose at least "Get". In the "Select principal" option click on "None selected" and now type the name of your VM to find the managed identity we created earlier. Choose your VM, click "Select". Finally, click "Add". Caution: Once you return to the "Access policies" blade, do not forget to click "Save"
So now that we have prepared everything, let's take a look at the PowerShell code. What you need to do is to add a few lines to your script that will help you retrieve the secret from the Key Vault during execution. Of course, you will need to run this on the Azure VM for which you created the system-assigned managed identity a few lines above.
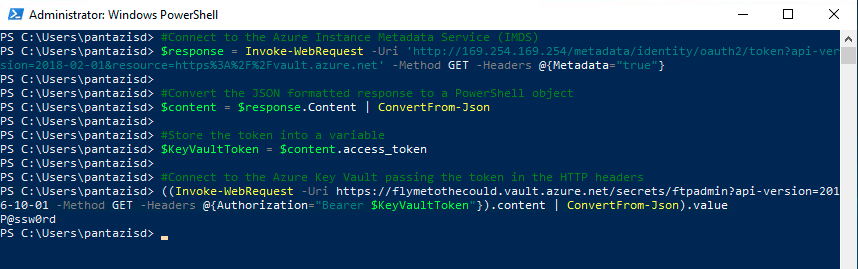
#Connect to the Azure Instance Metadata Service (IMDS)
$response = Invoke-WebRequest -Uri 'http://169.254.169.254/metadata/identity/oauth2/token?api-version=2018-02-01&resource=https%3A%2F%2Fvault.azure.net' -Method GET -Headers @{Metadata="true"}

#Convert the JSON formatted response to a PowerShell object

$content = $response.Content | ConvertFrom-Json

#Store the token into a variable

$KeyVaultToken = $content.access_token

#Connect to the Azure Key Vault passing the token in the HTTP headers

((Invoke-WebRequest -Uri https://<your_key_vault_URL>/secrets/<your_secret_name>?api-version=2016-10-01 -Method GET -Headers @{Authorization="Bearer $KeyVaultToken"}).content | ConvertFrom-Json).value</pre>

What happens in the code above is that the Azure VM connects to the Azure Instance Metadata Service (IMDS) in order to retrieve an access token. The response from IMDS is in JSON format so we need to use "ConvertFrom-Json" in order to extract the token string. Then, we make another request to our Key Vault incorporating the access token into the HTTP headers. This way, Key Vault will evaluate this token against the access policies and decide whether to allow access or not.
Note that in the last command you will need to fill in you Key Vault URL (available in the Key Vault's overview blade) as well as the secret name (ftpadmin in our example).


You can see the execution output in the following image.