
Managing an Azure environment can require a lot of effort, especially for large enterprises. Microsoft has released its own guidelines and recommendations around this topic in the Azure Landing Zones conceptual architecture, part of the Cloud Adoption Framework. It provides an opinionated approach on deploying and managing the foundations of an organization’s Azure estate, based on all the lessons learned by Microsoft and its partners after all these years of experience.
The good news is that you can easily benefit from this and start applying all these best practices on your own Azure environment today! Microsoft provides the following three implementation options for Azure Landing Zones:
- Portal Accelerator (GUI-driven)
- Bicep module (automation-friendly)
- Terraform module (automation-friendly)
As you might have guessed, this blog and its author love automation, therefore we will not focus on bullet #1 (although you can read about it at the Deploy Enterprise-Scale foundation page on GitHub). So, we are left with options #2 and #3. For this post we will work with the Terraform option.
Before we dig deeper, let’s make sure that you are familiar with the concepts of Terraform. Terraform is one of the most popular Infrastructure-as-Code languages, that can help you deploy and configure your infrastructure using declarative code syntax. It can work with all major public cloud providers as well as many on-premises platforms. There is a nice tutorial at Hashicorp Learn that can teach you all the basics for Terraform on Azure in less than an hour.
Back to our main topic, Microsoft provides the Azure Landing Zones Enterprise Scale Terraform module, which can help us quickly deploy the foundations of our Azure environment, such as management groups, policies, role assignments, networking, logging and security. To start, make sure that your workstation has all the necessary tools installed such as:
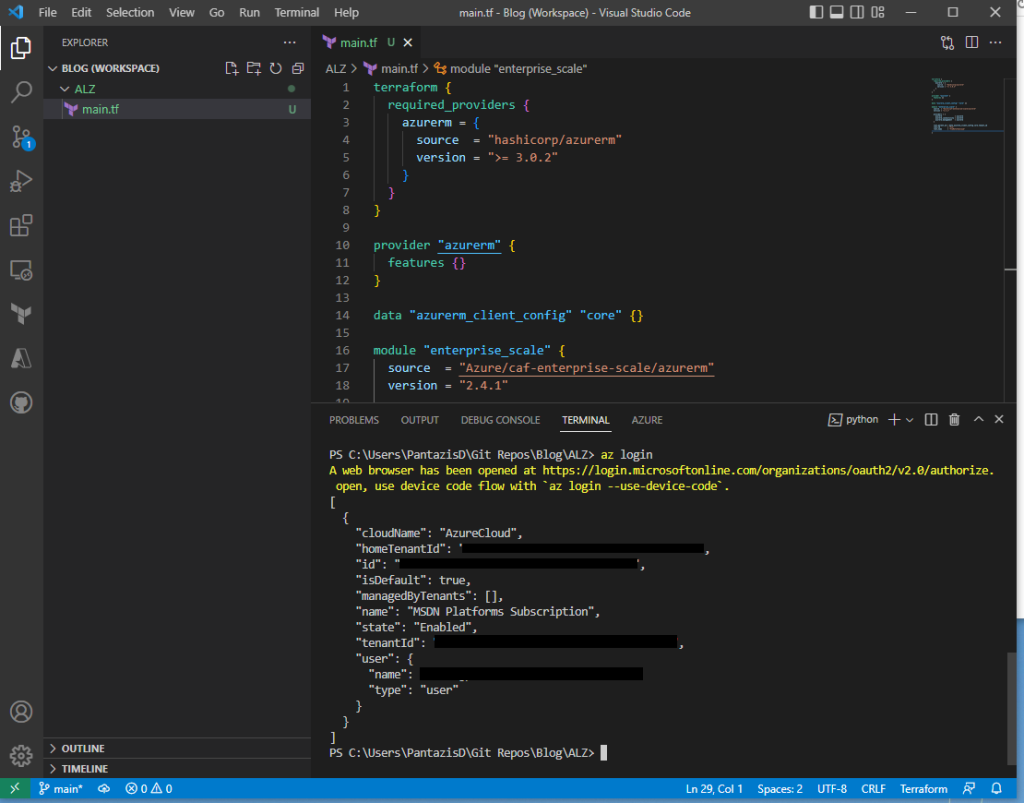
Launch VSCode and create a new folder e.g. “ALZ”. Next, create a new file “main.tf.” and type the following code:
terraform {
required_providers {
azurerm = {
source = "hashicorp/azurerm"
version = ">= 3.0.2"
}
}
}
provider "azurerm" {
features {}
}
data "azurerm_client_config" "core" {}
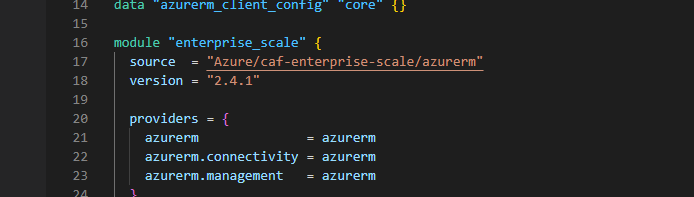
module "enterprise_scale" {
source = "Azure/caf-enterprise-scale/azurerm"
version = "2.4.1"
providers = {
azurerm = azurerm
azurerm.connectivity = azurerm
azurerm.management = azurerm
}
root_parent_id = data.azurerm_client_config.core.tenant_id
root_id = ""
root_name = ""
}Make sure to give root_id and root_name values that are suitable to your organization. For example, if you work for the “FlyMeToTheCloud” company, you can set it to something like:
  root_id        = "Fly"
  root_name      = "FlyMeToTheCloud"
On VSCode open a terminal and make sure that you cd to the directory that contains your main.tf file. Then, type “az login” to connect to your Azure tenant.
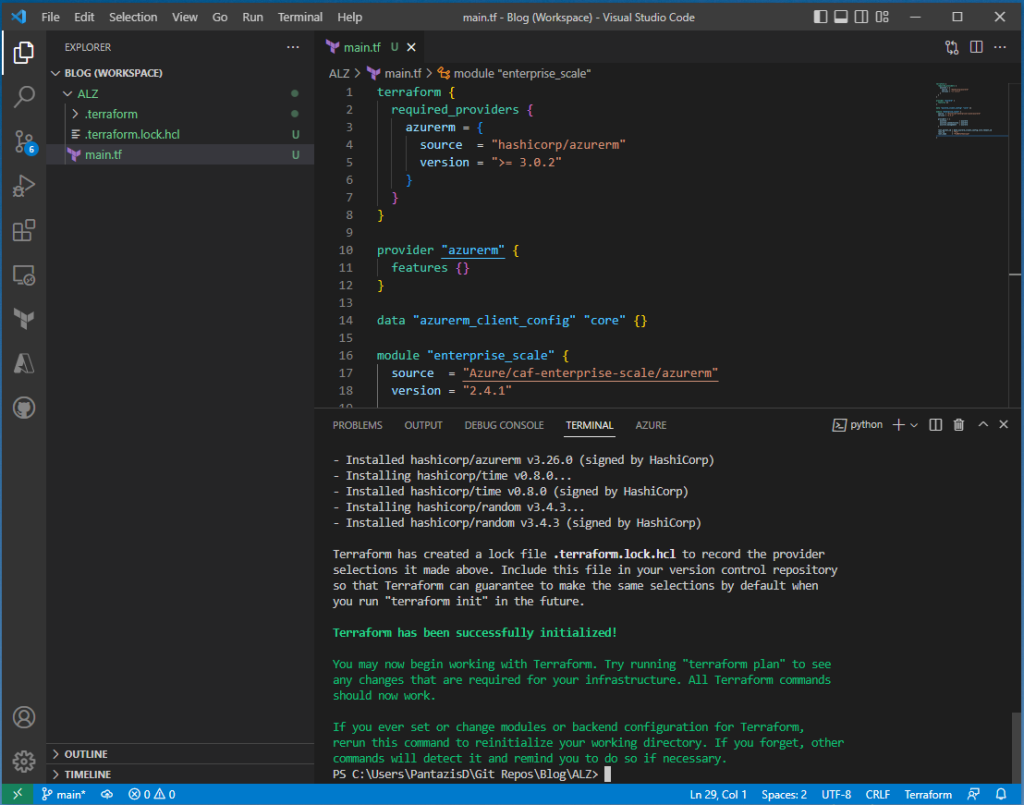
Now, run “terraform init” to initialize Terraform for the new configuration.
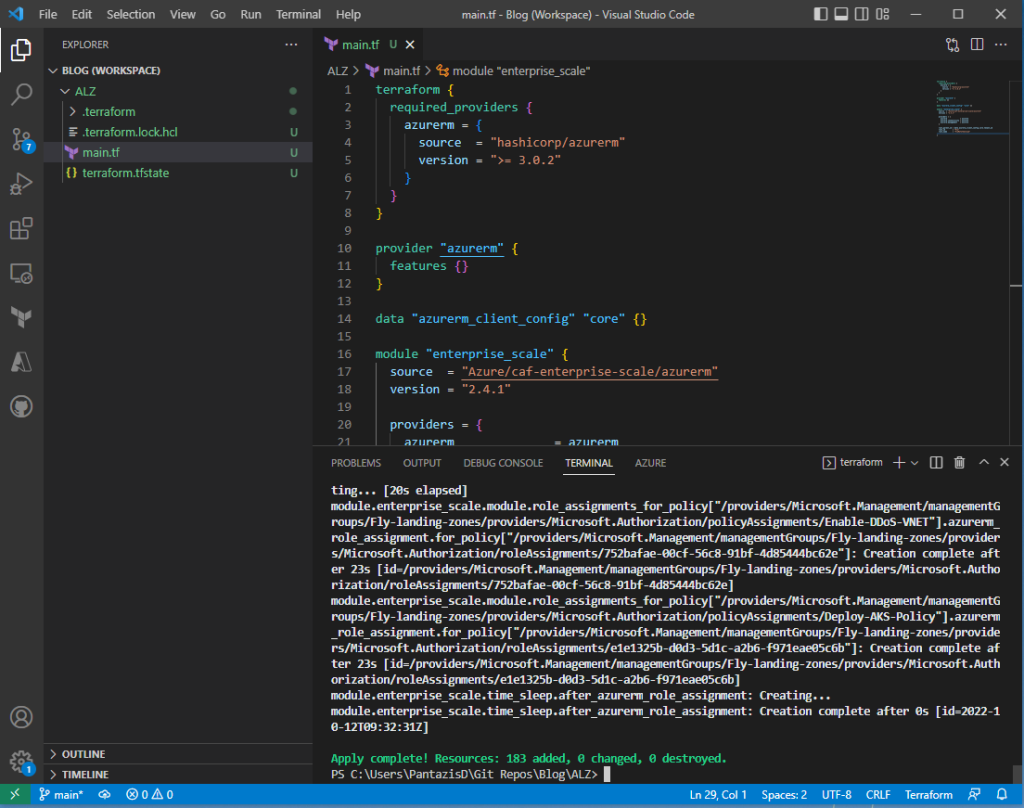
Next, run “terraform plan” to preview the changes that the new configuration would apply to Azure. Take a look to the output of this command. In this case, 183 new resources will be created in Azure. This is expected. You can scroll up in the terminal window to review the detailed list of what will be deployed.

Finally, run “terraform apply” to deploy the changes to Azure. When asked, type yes to approve the planned changes. Once completed, review the number of resources that have been deployed to Azure.
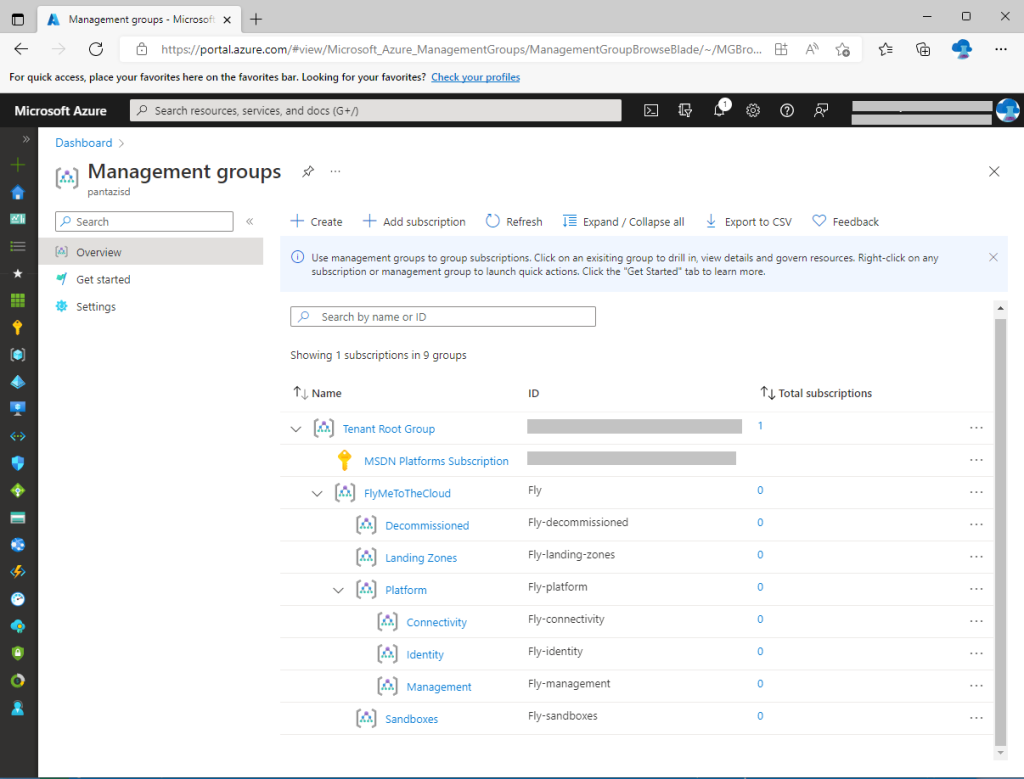
Navigate to the Azure Portal and review the applied changes. For example, open the Management Groups page and review the new management groups. Note that there is a new MG called “FlyMeToTheCloud” with the ID “Fly”. This is the “Intermediate Root” MG.
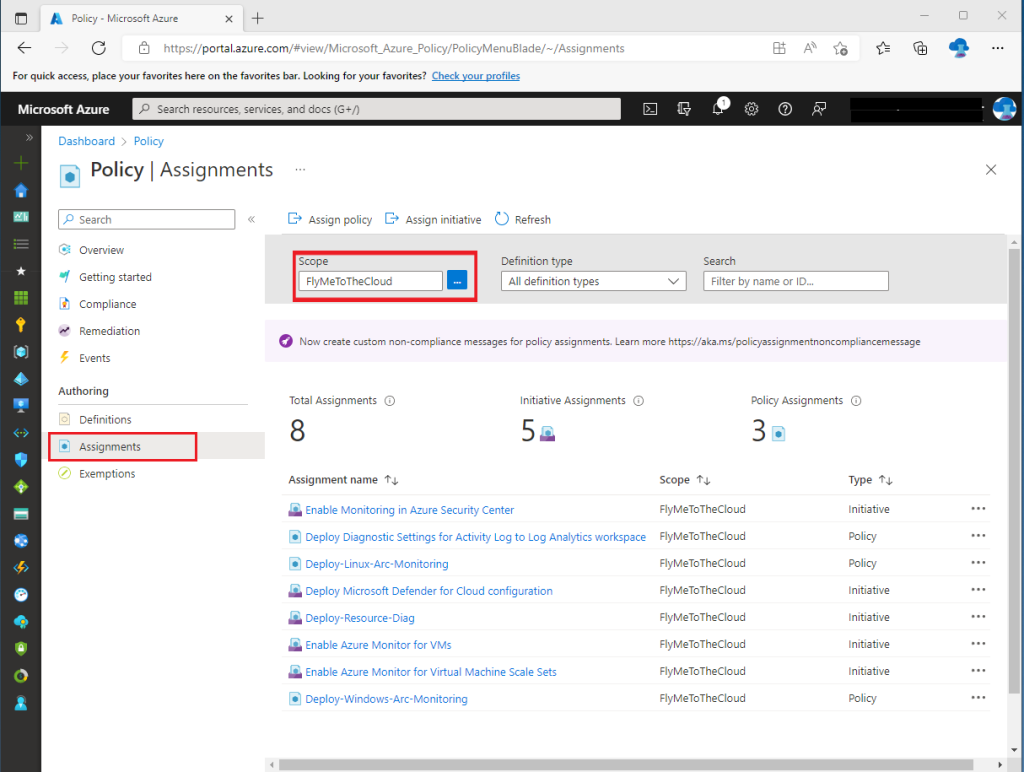
You can also review the policy assignments created by our deployment. On the Azure Portal, navigate to “Policy”, click “Assignments” and set the “Scope” to the Intermediate Root MG which in our case is “FlyMeToTheCloud”. You can have a look at all the actual policies assigned at the dedicated page on GitHub.
The above changes should not produce any charges to your Azure subscriptions. After all, we just created some management groups and applied a few policies, which are all provided for free. Furthermore, these should not impact any resources (e.g. Virtual Machines) that you might have already created, since we did not move any subscriptions under these MGs. We will discuss this point in a future post.